Was your first thought, ‘what?!’
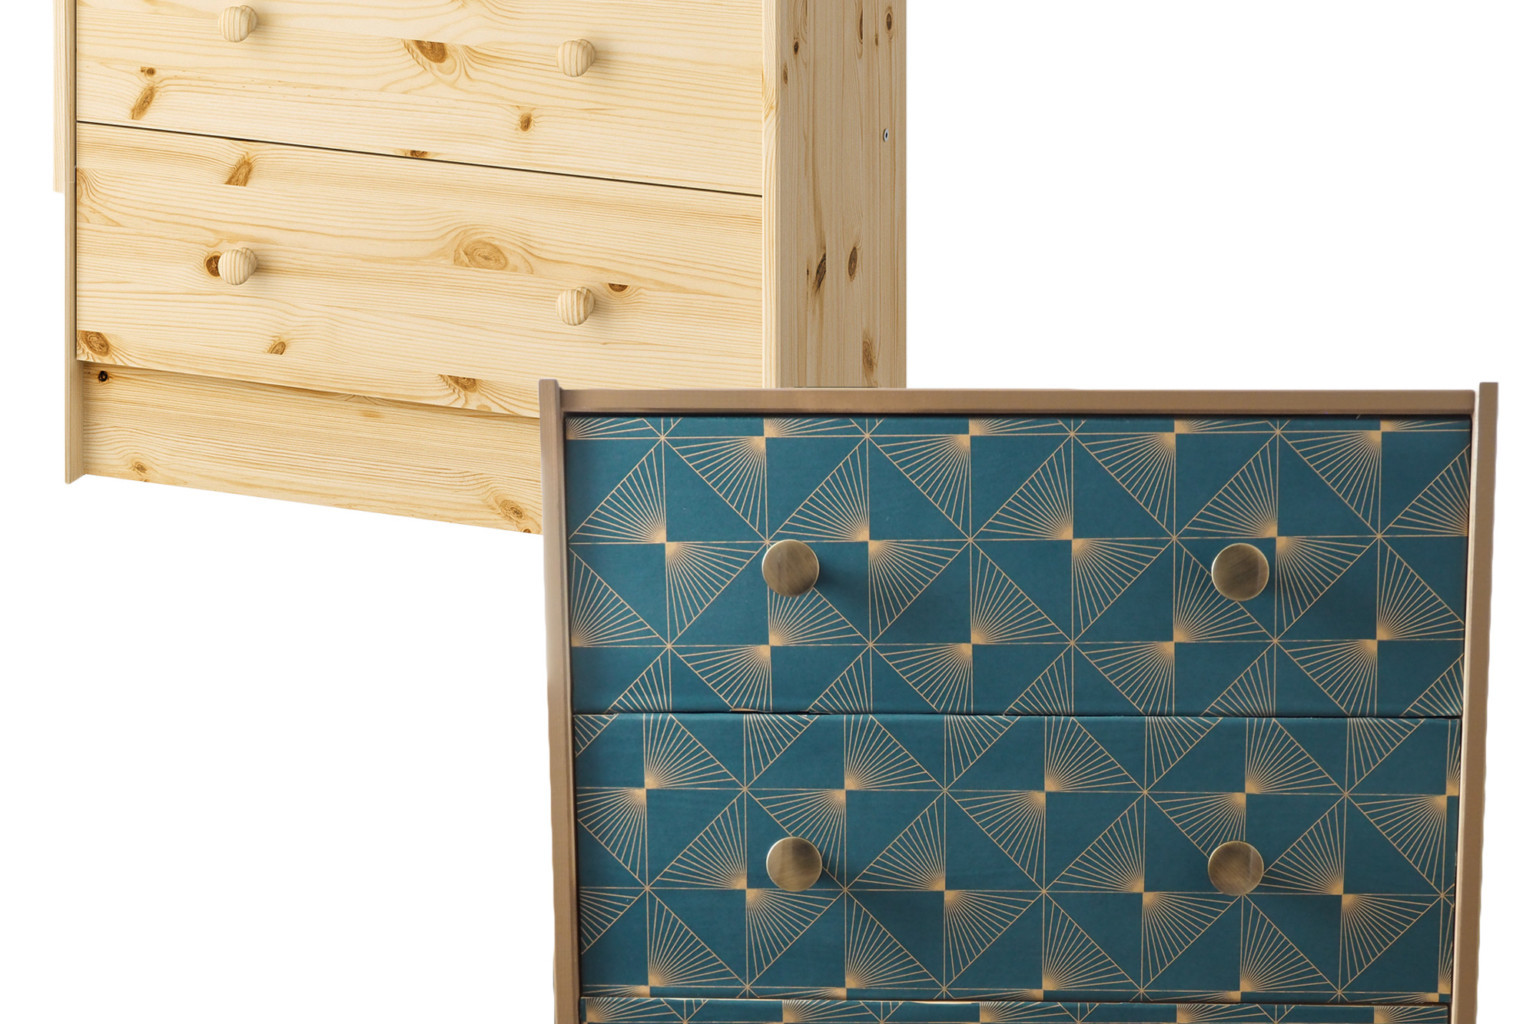
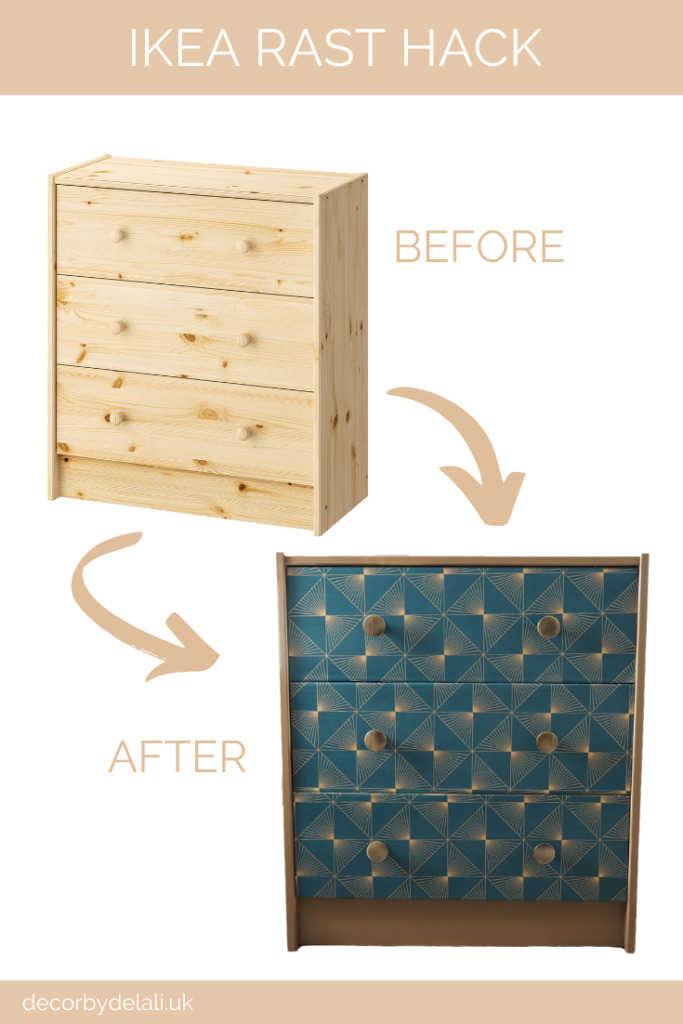
What the flip is an IKEA Rast hack? Well a simple hack, is taking a piece of furniture and changing its appearance with paint/spray paint, vinyl wraps, stickers or wallpaper. ‘Rast’ is the name of the small but perfectly formed drawer unit that IKEA sell. 1+1 = an IKEA Rast hack by me!
There are entire online communities full of people sharing their projects and advice on how to achieve the perfect hack. A lot of hacks are done on IKEA pieces, and plenty of them are on Rast drawers.
Why did I hack?
I was looking for a pair of bedside tables to work with the colour scheme I’ve put together for our new master bedroom (more on that another day), but couldn’t find anything that ticked any of my boxes. Nothing I found was,
– in my budget
– the right size and height
– the right colour or material
So I decided to challenge myself and give a hack a go (a decision I would absolutely question later!)
What I used:
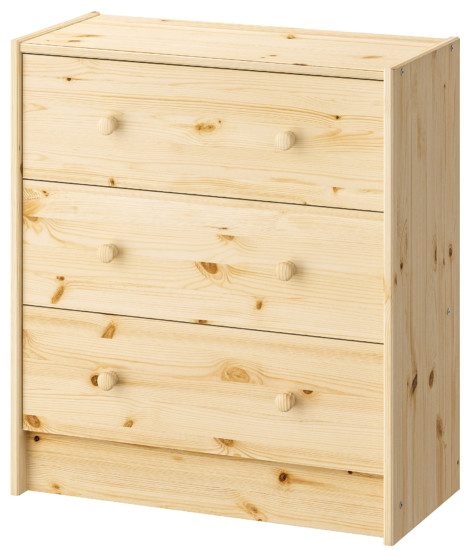
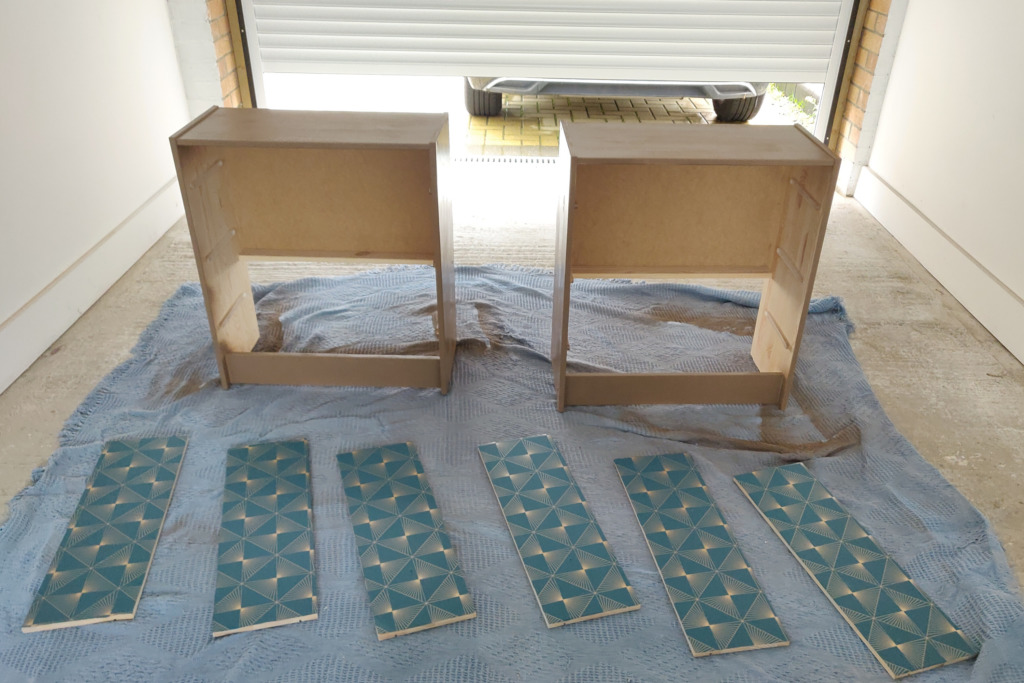
- x2 IKEA Rast units – IKEA
- Grey primer / basecoat (matt finish)
‘Nutmeg’, Painter’s Touch (satin finish)
Clear, ‘Crystal Clear’ protective coat (semi gloss finish)
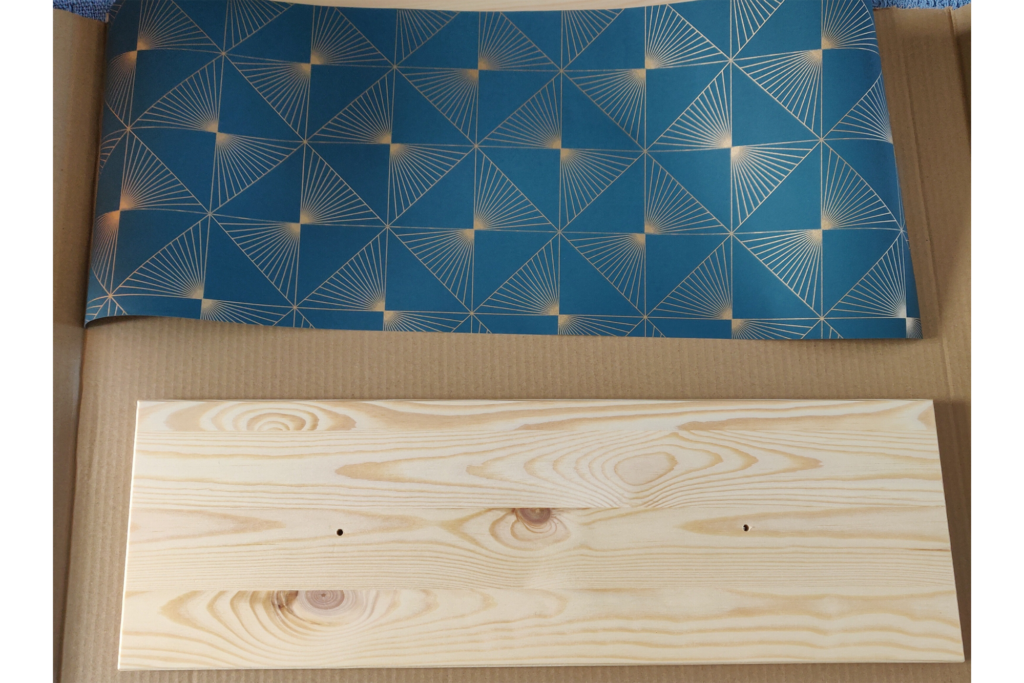
– all Rust-Oleum spray products from B&Q - One roll of wallpaper, ‘Lines’ by Caselio – Wallpaper Direct
- x12 brushed gold effect knobs – B&Q
- Wallpaper paste and brush
- Scalpel or really sharp DIY knife
- Sandpaper
The process
1.
I put the frames together, brushed them down to get rid of any splinters or dust, then sprayed them with primer and left them to dry.

2.
As I’d decided to (make my life difficult and) use wallpaper on the drawer fronts, I tackled them next.
I used one of the fronts as a template and cut out six pieces of wallpaper. I cut them slightly larger than needed to give myself room for mistakes (let’s just say I was glad of the extra paper later on).
3.
Then I got busy with the paste and brush. Pasted the paper, lined them up as best I could and left them to dry.
4.
With the primer dry on both frames, I gave them a light sanding, (just enough to make sure they were smooth and not take off any of the primer), then sprayed them with my chosen colour and yes you guessed it – left them to dry.
A little later I gave the drawer fronts a couple layers of the protective coat to seal the paper and did the units as well.
5.
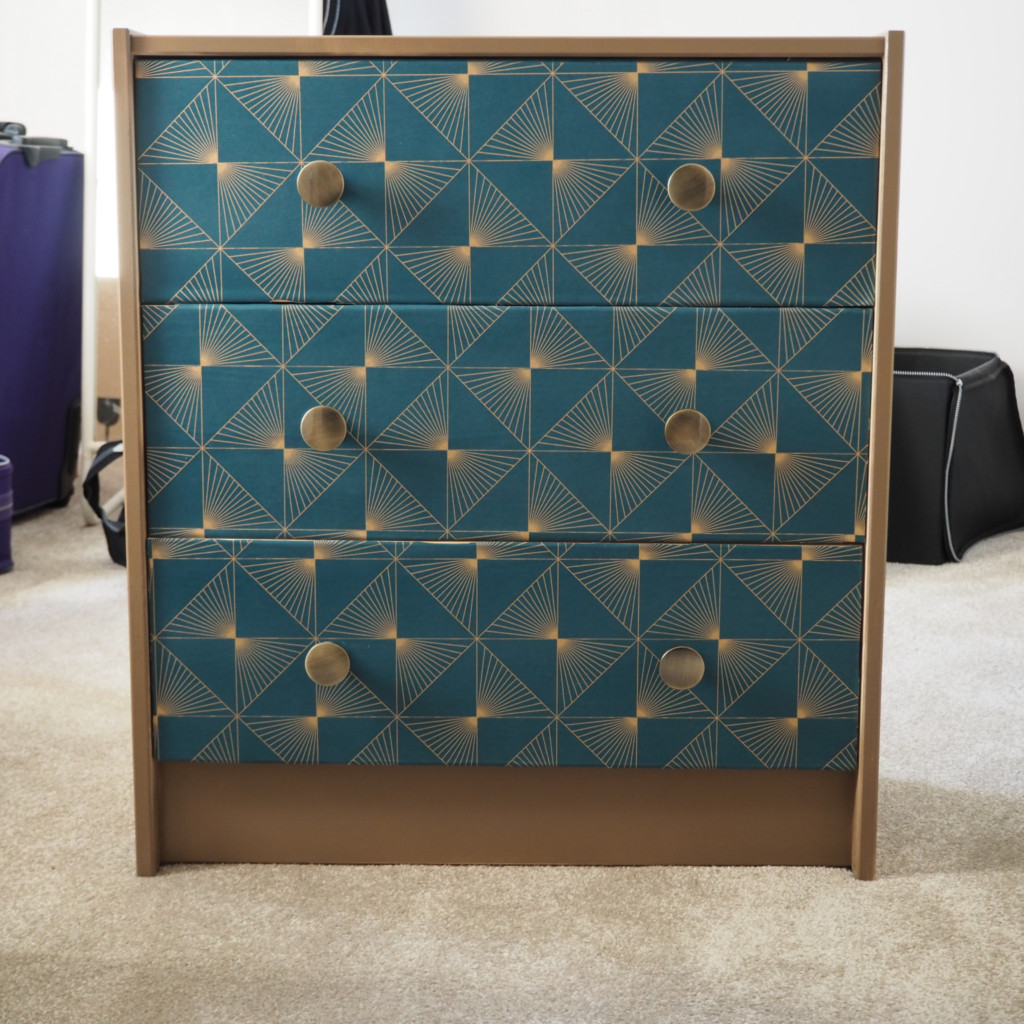
Once the fronts were dry, I put the drawers together, added my pretty new knobs and that was basically it!
(Full disclosure, there was some jigging and trimming that had to happen to make sure the wallpaper on each drawer front was as tidy as I wanted and not overlapping in any direction.)
The finished product!
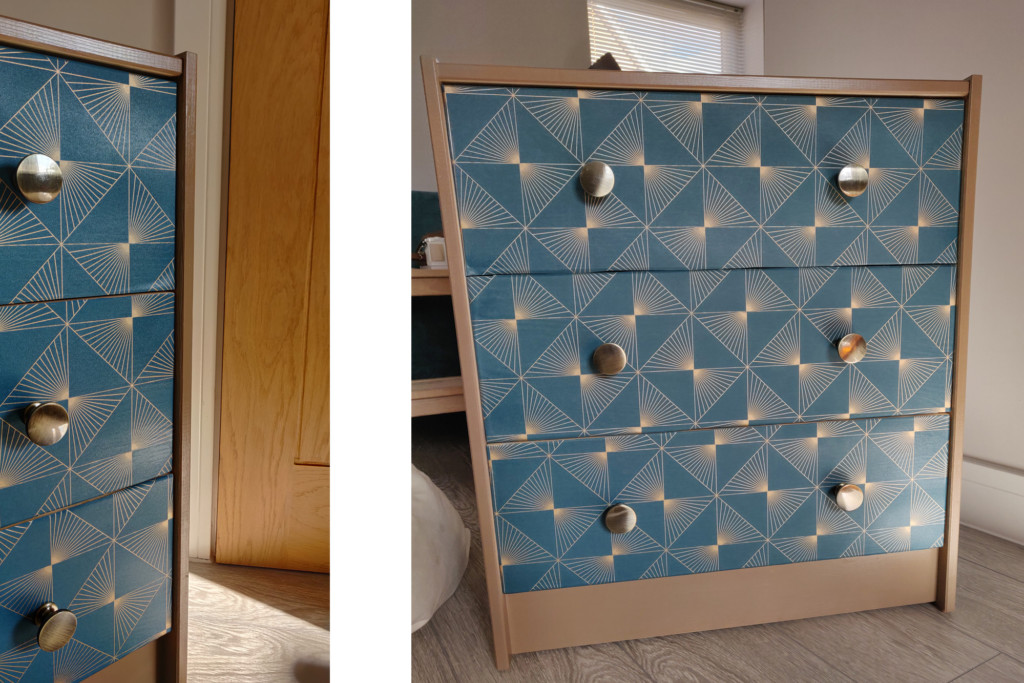
We’ve not long moved in, so there are no insta-perfect styled shots to share. There are boxes everywhere and we’re mid-decorating, but why wait to share the goodness eh?
I really don’t know what possessed me to try this for the first time by doing two at once. However, I lived to tell the tale, with only one minor nail casualty and I’m very pleased with the result!
This was the condensed process, as I did it slowly over two weekends and in-between some other stuff. I’m not sure exactly how long it took – but as you’d expect, the drying times were the longest part.
| Tips for using spray paint 1. If, like me, you’ve never used spray paint before, just follow the instructions on the can and you’ll be fine. 2. Prepare your wrists! Unless you’re used to it, the ‘continuous spray’ motion puts a weird pressure on your hand(s) and wrist(s) that I was not ready for… 3. Make sure you have a REALLY well ventilated space, not one or two open windows, but a proper ventilated area, because the fumes are no joke! |